Note : do not include the “.shp” extension otherwise Navit will
complain with
error:map_shapefile:VSI_SHP_Error:error:Unable to open maps/shapefile/gis.osm_roads_free_1.shp.shp or maps/shapefile//gis.osm_roads_free_1.shp.SHP.
Now we need to create the relevant .dbfmap. If you use features from
different files (e.g streets from gis.osm_roads_free_1, water polys from
gis.osm_water_a_free_1 ) then you will need to create one .dbfmap file
for each shp file.
Here is a minimalistic gis.osm_roads_free_1.dbfmap :
code=5111 type=highway_land label=${name}
code=5112 type=street_1_city label=${name}
code=5113 type=street_2_city label=${name}
code=5114 type=street_3_city label=${name}
code=5115 type=street_4_city label=${name}
code=5122 type=living_street label=${name}
Note : the first field (code, in this example) and the type field must
be separated by a tabulation, not spaces.
4.5.28. How can I find the field name and value to use?
The content of your .dbfmap will vary depending of your map source. One
way to analyze shapefile tags is to use QGis
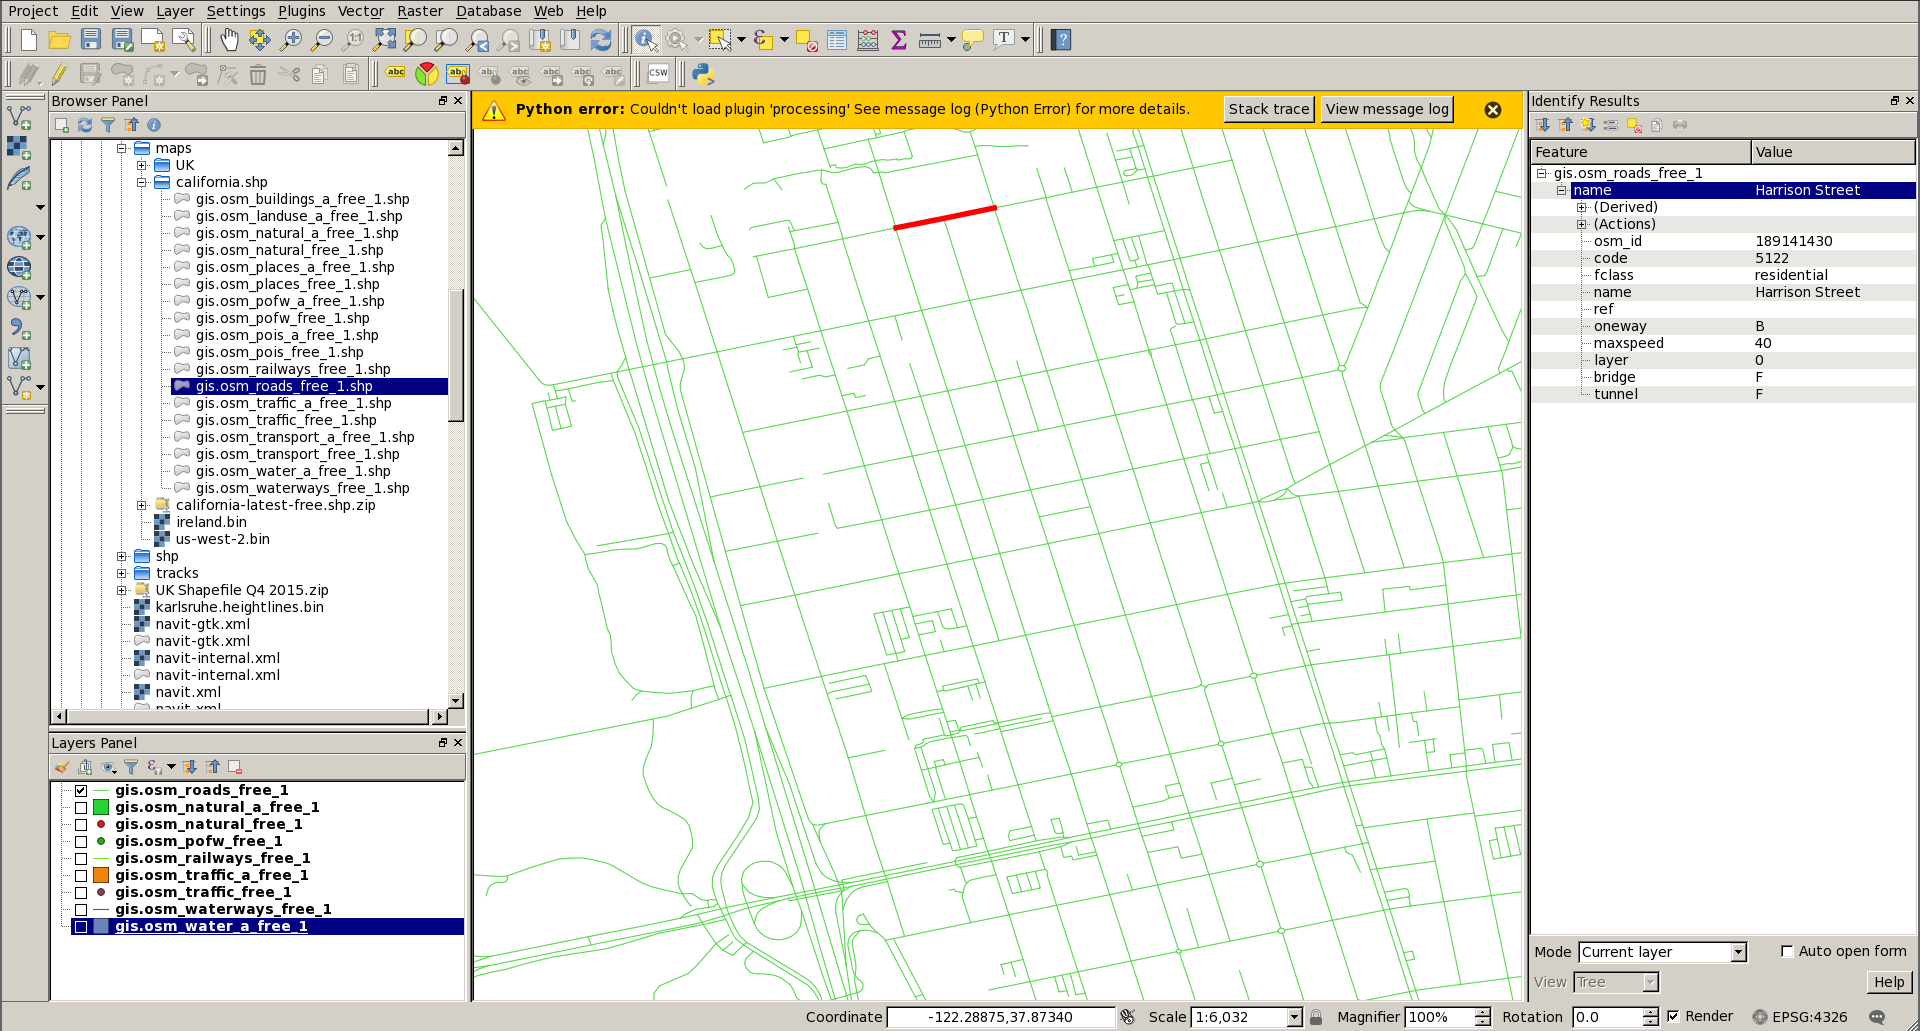
In this example, we are loading again the shapefile from OpenStreetMap.
When displaying the streets, we can select one specific segment and look
at its tag. In this example, we can see the street name is under the
“name” tag (used in label=${name}) and the code=5122 which would
correspond to a “living_street” in Navit. Highlighting several segments
of the same street might help identify which tag (“code” here) and which
value (5122 here) to use.